Setting Up a Marine Aquarium: 8 Steps to Setting Up a Saltwater Aquarium – 2023
When setting up a marine aquarium, the first question you need to ask yourself is: What kind of aquarium do I want? The answer will determine your shopping list. Once you’ve decided on your marine aquarium and acquired all the necessary materials, use this guide to set up your saltwater aquarium.
If you don’t have any planning in mind, it’s better to first determine what you want and then proceed with the setup. Otherwise, if you improvise, you may encounter missing or incorrect materials halfway through the installation. We’ve also compiled a list for you regarding marine aquarium materials.
Step-by-Step Marine Aquarium Setup
First, let’s list the materials you’ll need to set up a marine aquarium.
Required Materials:
- Aquarium: Once you’ve decided on the species you want to keep, purchase an aquarium of a size suitable for their healthy living.
- Protein Skimmer: Essential for collecting waste and excess protein in the marine aquarium. The protein skimmer helps ensure the aquarium water remains healthy for the fish by collecting harmful elements such as nitrites and ammonia.
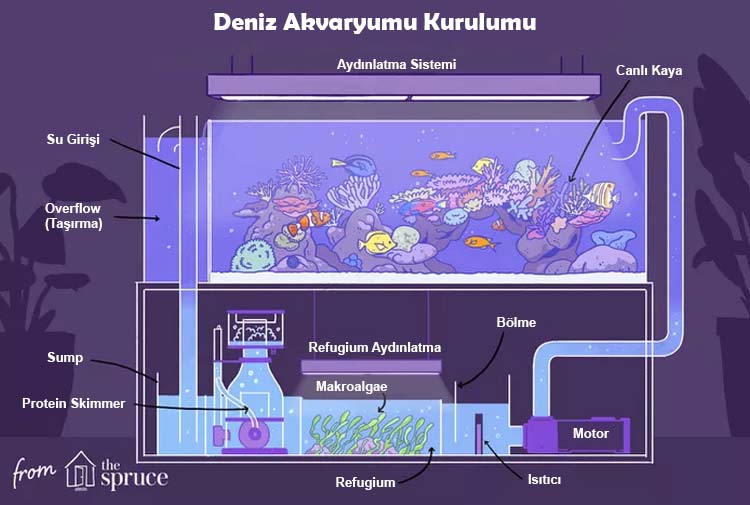
- Filter and Filtration Equipment: This may vary depending on the type and size of the aquarium you desire. After some research, purchase the filtration system necessary for the saltwater aquarium setup you have in mind. If you choose to use a sump instead of a filter, you will need filtration materials and an adequately sized pump. By using a sump, you can prevent a cluttered appearance in the aquarium by housing heaters, protein skimmers, and other equipment within it.
- Wave (circulation) pump: Acquire an appropriately sized wave pump to keep the water moving. This circulation helps keep the fish active and propels settled waste towards the filtration system.
- Live Rock: Depending on the environment you desire in your aquarium, you must decide whether you want an environment with live rock or without. These rocks are essential for marine fish, providing shelter against potential threats, establishing territory, hiding, sleeping, and stress reduction.
- Lighting: Essential for your aquarium setup. Purchase lighting suitable for your aquarium size or create a lighting setup yourself.
- Sand (Substrate): Opt for substrates that rise 3-4 cm for marine aquariums. The deeper the sand, the more challenging it is to clean. If you’re keeping species like Jaw Fish or Garden Eels that prefer deep sand, you’ll need to use a deeper layer.
- Marine Salt: Essential for setting the marine atmosphere of the aquarium. There are various marine salt products available in the market.
- Salt meter (Hydrometer) and other tests: Essential for adjusting the salt ratio. You can purchase it under the name salinity test device. It measures the density of the water and ensures the correct salinity. Basic test kits are also necessary to detect harmful elements in the water and intervene accordingly.
- Thermometer and Heater: The heater size depends on the aquarium size you’ll be setting up. There are various types of heaters available in the market. Choose one that suits your budget and is of good quality. Additionally, you need a thermometer to monitor the temperature.
- Cooler: This step is optional. If you wish to house coral and invertebrate species, you’ll need a cooler. Otherwise, it’s not necessary. If the aquarium water temperature rises excessively during summer, fans can be directed at the water surface to cool it down a few degrees.
- Air pump: A circulation pump and sump can supply sufficient oxygen to the water. However, if there’s insufficient water movement, use an air pump to increase oxygen levels.
- Maintenance tools: Net, bucket, siphon for gravel cleaning, and materials like sponge and soft brush to clean algae off surfaces. Dedicate a day weekly for aquarium maintenance to ensure the well-being of its inhabitants and the aquarium itself.
- Timer outlet: Not a must-have but acquiring one will save you the trouble of manually turning the lights on and off every day.
1. Prepare the Aquarium
Get the aquarium ready for setup. Before placing it on its stand, cut and place a 1cm thick white foam or similar soft material underneath. Position it on the stand and ensure it’s level. Before adding water, ensure proper placement and leave space for cables and hoses. Clean the interior and exterior of the aquarium using a clean cloth or sponge.
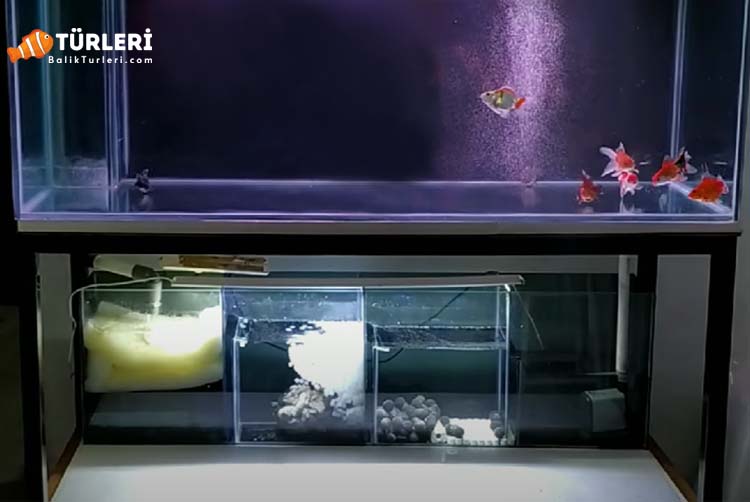
Sample Setup Schematic:
2. Add Necessary Filtration Materials for the Sump
If you’ve chosen not to use a sump, you can skip this step. However, using a sump for marine aquariums tends to be sturdier, more suitable, and cost-effective. There are various types of sumps available, including side sumps, back sumps, or sumps set up in a separate aquarium.
If you’re unfamiliar with sumps, you can have one designed and made by a trusted aquarium manufacturer. Fill the sections of the sump you’ve had made with the necessary materials in sequence.
Sample sump setup:
- Place your materials in the required sections.
- Attach hoses that will lead from the aquarium to the sump.
- Install the water inlet and outlet hoses.
- Position the protein skimmer.
- Place the heater.
- Lastly, position the pump.

3. Place Materials Inside the Aquarium
If you wish to conduct the subsequent wet test, it’s recommended to do so when the aquarium is empty.
If you’re not using a sump, you can proceed with setting up the aquarium filter system and other equipment. Position the hoses that will lead in and out of the aquarium from the filter, ensuring each one is on opposite sides. Rinse the necessary materials you’ll be using inside the filter with clean water and then place them sequentially inside the filter.
Position the heater, thermometer, protein skimmer, sand, rocks, and any other decorative items you wish to use according to your desired design. Once everything has been set up, you can proceed with the wet test. If you want to conduct a wet test and have already decorated your aquarium, you must absolutely remove the live rocks during the testing phase. Freshwater can kill the organisms on these rocks.
4. Wet Test Phase
This step is optional. Conducting a wet test for your marine aquarium ensures that every piece of equipment operates correctly and that there are no issues like water leakage before finalizing the setup. Use freshwater for the wet test. If you’ve added live rock, don’t forget to remove it before starting the test! Otherwise, the organisms on the live rocks will die.
Follow these steps in sequence:
- Verify all connections and ensure hoses are properly attached.
- Fill both the aquarium and the sump with water.
- After filling, dry all wet areas thoroughly.
- Start up your devices, filter, or sump pump.
- At this point, check for any leakage in hose connections and other areas.
- If everything seems fine, unplug all devices.
- Simulate a power outage to confirm that the water exchange between the sump and the aquarium is correct and that no overflow occurs.
- If you notice any overflow in the sump, drain some of the water from it. Then, restart the entire system and complete the test.
5. Adding Sea Salt and Sand
If you’ve completed the wet test phase, begin by removing a few liters of water from the aquarium and mixing the marine salt into this water. Measure the salinity, ensuring the specific gravity (salt concentration) lies between 1.022 and 1.025. Pour the adjusted water into the sump and start the system.
If you’ve chosen to use a filter instead of a sump, activate the filter and slowly pour the adjusted water towards the filter’s outlet, allowing the salt to dissolve. Remember to measure the salinity during this addition.
If you decide to add sand when the tank is filled with water, stop the system and gently introduce the sand. If you wish to prevent the water from becoming cloudy when adding sand, you can utilize the method shown in the suggested video below (Note: the video is not provided here, but the original content suggests its existence).
If you’ve chosen live sand, it’s best to add it after setting the salinity. If you’re using regular sand, consider rinsing it in some water before adding to the aquarium.
6. Design and System Start-Up
In this step, you should create the design you have in mind. Incorporate live rocks, plants, and other decorative items to shape the look you desire. However, ensure that the live rocks are ready for use.
For marine aquariums, the live rocks you use need to be cured. Directly placing the rocks from the sea into the aquarium is not advisable. If the rock dries out, gets damaged during transport, isn’t stored in appropriate conditions, or is left idle for too long resulting in the death of its organisms, then it’s no longer considered “live” rock.
If you’ve obtained rocks that are already cured and ready for use, you can proceed with your design at this stage. However, if the rocks need curing, you can seek guidance from the provided video below (Note: the video is not provided here, but the original content suggests its existence). The curing process isn’t something to be rushed. Therefore, you’ll need to exercise patience until the curing process is complete.
After finalizing your design, activate the filter or sump, the protein skimmer, and other devices to bring the entire system to life. In the initial hours, the water might appear cloudy or foggy. This will naturally resolve as the filtration process continues, and within 24-48 hours, your water should be clear and pristine.
Marine aquarium fish are as sensitive as freshwater fish. Hence, before adding your fish, it’s crucial to let the system run without any live organisms for a few days to ensure the water reaches the necessary parameters (a recommended duration is one week). Afterward, you can slowly introduce your fish and other marine life.
7. Lighting System
When your saltwater aquarium is naturally cycling and preparing the water, it’s time to transition to the lighting system. The choice of lighting will depend on the kind of marine life you wish to keep. If your aquarium will only house fish, you’ll have various lighting options.
To ensure your fish have their rest, you should allow at least 8 hours of darkness for them. To differentiate between night and day, you can utilize timer plugs. These timer plugs can automatically turn the light on and off at set intervals, providing a dark environment for your fish to sleep.
However, if you’re planning to include corals in your marine aquarium, you’ll need to adjust your lighting accordingly. Corals require specific kelvin values. Hence, when choosing lights for your coral setting, pay attention to several factors:
- Wattage
- Kelvin value
- Reflector design (for fluorescent lighting)
- Use of lenses (for LEDs)
- Distance of coral from the light
- Distance of the lighting from the water surface
- Quality of components like lamps, ballasts, and drivers
Once you’ve completed the lighting setup, adjust the timer plug, make the necessary connections, and activate it. At this stage, since everything will be more clearly visible, if you want to make any adjustments to your aquarium design, do so cautiously to avoid stirring up the sand.
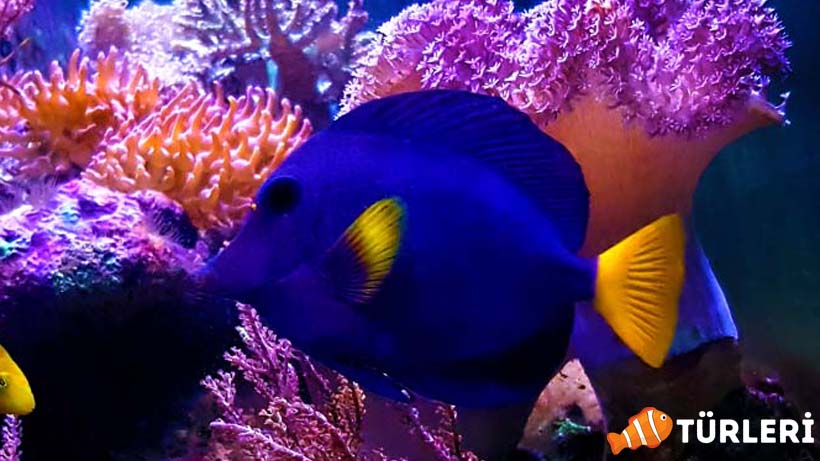
8. Introducing the Fish
Marine aquarium fish often possess more visual splendor than freshwater fish. Before adding your fish, it’s crucial to ensure the water has settled and reached its ideal parameters. When introducing fish, it’s vital to avoid any actions that might shock or stress them. Remember, a smooth transition is key to their wellbeing and adaptability to the new environment. Always acclimate them properly and be gentle during the introduction process. Avoid sudden movements and bright lights, and give them time to explore and get accustomed to their new home.
For your filtration system to acquire the necessary beneficial bacteria, some time will be needed. During this period, fish can get sick due to sudden changes. Therefore, it’s important to introduce them slowly and carefully.
How many fish should you add?
The answer to this question is directly related to the size of your aquarium and its environment. Considering marine fish are generally larger than freshwater fish, you can calculate based on size. You can estimate by considering 20 liters of saltwater for every 15 cm of fish.
If you’re new to marine aquariums, initially introduce no more than 3 fish. This way, you can learn about them, gain experience, and then gradually increase the number of fish as your aquarium can accommodate. By this time, your biological filtration would be well-established, making the environment optimal for any new fish.
The fish you introduce at the beginning will contribute to the biological balance by releasing ammonia into the water. If you’re not experienced, always choose fish that are suitable for beginners. Using a bacterial culture at the start is also recommended. This will accelerate the growth of beneficial bacteria.
Initially, adding snails and hermit crabs can help control future algae growth and waste. Also, make sure to refer to a marine fish compatibility chart to choose fish that can coexist harmoniously. Here are some species suitable for beginners:
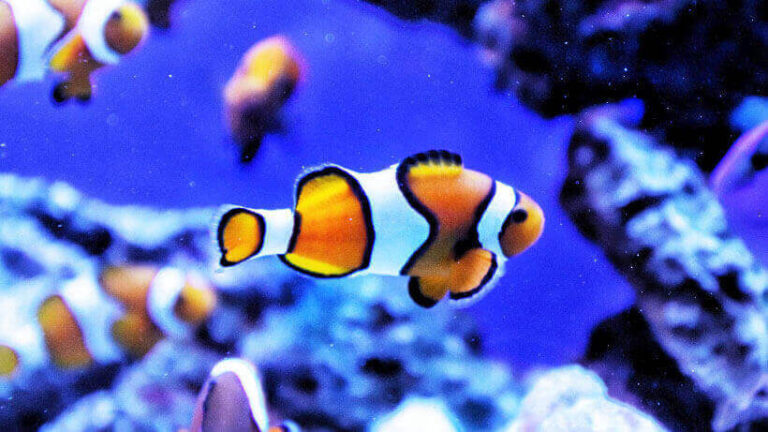
- Clownfish (Palyaço Balığı)
- Queen Angelfish (Kraliçe Melek Balığı)
- Flame Angelfish (Alev Melek Balığı)
- Threadfin Butterflyfish (Auriga Kelebek Balığı)
- Raccoon Butterflyfish (Hilal Maskeli Kelebek Balığı)
- Blue Green Chromis (Mavi Yeşil Damsel)
- Yellowtail Damselfish (Sarı Kuyruklu Damsel)
- Squirrelfish (Ateş Balığı or Ateş Goby)
- Sleeper Banded Goby (Uyuyan Bantlı Kaya Balığı or Kurşun Kayabalığı)
- Pretty Prawn
- Lionfish (Volitan Aslan Balığı)
- Blue Tang
- Yellow Tang (Sarı Tang)
When setting up your marine aquarium, patience and care are key. Ensure to monitor your water parameters regularly, and give your fish the best possible environment to thrive in.

Before proceeding with the marine aquarium setup, ensure that you have read every step thoroughly and made the right choices. If you’re uncertain about adding corals, you might consider postponing this step for now. Corals have high requirements and, being among the most sensitive organisms in an aquarium, they can make the setup more challenging.
Always adhere to the calculations before adding fish. Regardless of how small they seem to you, the amount of ammonia and waste each fish introduces into the aquarium could become problematic down the line. It’s crucial to understand if your marine aquarium is ready to accommodate more fish before increasing the number.
In the period following the initial setup, it’s essential to monitor the water parameters closely. Keeping harmful elements like ammonia and nitrite in check is of utmost importance. By obtaining simple test kits, you can regularly check these levels.
In conclusion, if you have any queries or concerns about the setup, feel free to leave them in the comments. We will be happy to answer them promptly.
FAQs
Is Marine Aquarium Maintenance Difficult?
Contrary to popular belief, maintaining a marine aquarium is not difficult. There are key points to be mindful of during and after the setup process. If you wish to have healthy fish and a thriving saltwater aquarium, it’s essential to pay attention to these details.


